In this post we will see how to work with the Interface Builder tool of the XCode.
What is Interface Builder: It is a tool which helps you in dragging the controls from the tool library into the instance of UIView and helps you to adjust the view by just moving the controls via mouse and helping you to quickly complete the design phase.
Design phase: For this post we will use the interface builder to display a table view. Here’s a view at the final output

As you can see its just a simple table nothing much fancy about it but the important part is that here you are creating a table without adding the subclass of the UITableviewController because you will be using the interface builder and the UIViewController subclass.
Step 1: Open Xcode and create a windows based application give your project an appropriate name and add the UIViewController subclass file to that project with the name MyViewController, now this will result in adding two new files into your project with the name myViewController.h and myViewController.m. Below are the images which will guide you in the entire process.


Since we are working with the interface builder then please make sure that the With XIB for user interface check box is checked. This will add a file with the extension xib into your project with the same name as your class in this case MyViewController we will get back to the description part of xib sooner.

Step 2: In this step I will show you how to display the tool box library containing all the controls that we used till now via coding so in order to do that select the MyViewController.xib file and from the View toolbar select the last tab which is also know as the utility tab, once you do that you will get a view like this
If you are not able to see the controls then in that case have a look at the above pic their you can see that i have highlighted the object library so you can click on it and see all the controls that we have used so far, select the table view from the object library and drag it from their and drop it inside the UIView instance and once you have done that here's the final pic that you will be getting

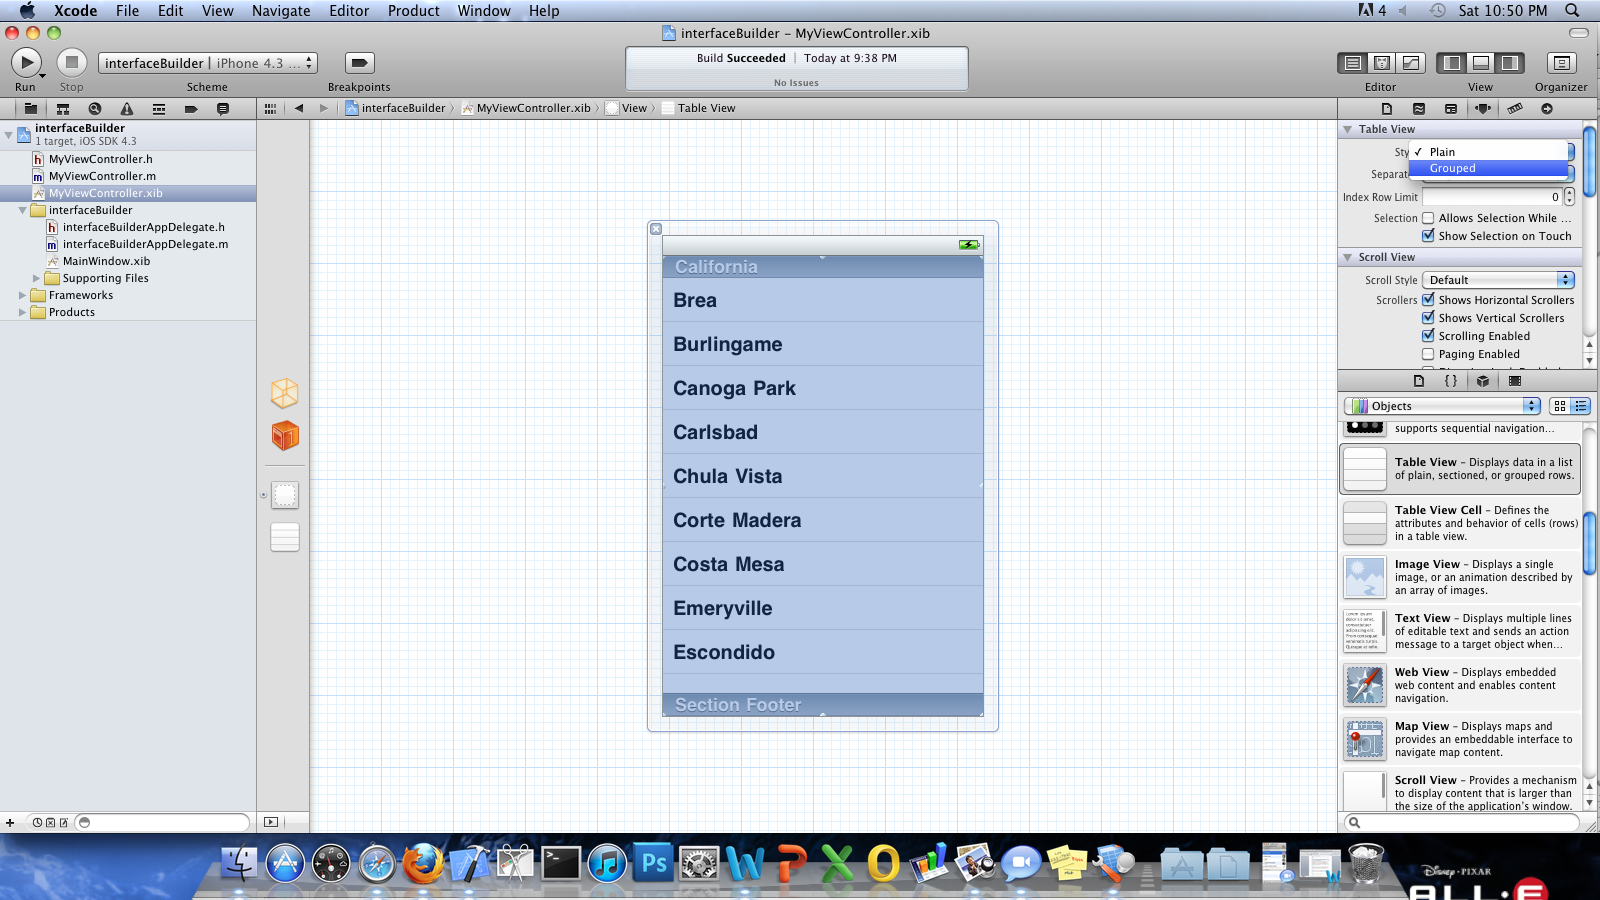
Since this is a control it must be having its attributes so that we can perform some customization onto it so lets find the Attributes inspector and try to change the style of the table view from plain to grouped also you can perform changes on a particular control by selecting the control first and then selecting the proper attribute from the attributes inspector.

Step 3: Since we are working with a table view then in that case we would require the datasource and the delegate methods of the table view, so you may copy paste the required methods of the table view from the documentation of the UITableViewDataSource and UITableViewDelegate you may also refer one of my earlier tutorials on table view for the above methods.
The Xib file that you have added into the project during the class creation stands for XML Interface Builder and any changes that you make inside your view like a change in the attributes of a particular control or you change the background color of the view or any change those changes are stored inside the XML and at run time those changes are reflected.
But their is a problem and the problem is that XIB is a different file and knows nothing about the functionality of a control that you are adding into it i.e if you are adding more that one button or text fields then in that case it dosent know which function to call on a particular button touch or what should be the text for the textfield1, so inorder to make tell the interface builder about a particular control you have something called as the IBOutlet and inorder to tell the interface builder about the functionality that you want to associate with a control you have something called as the IBAction.
IBOutlet: If you are working with Interface builder that you have to create the outlets of all the controls that you use because it is with the help of these outlets that the Interface builder will come to know that this is your button1 or this is your tableview control.
IBAction: This is the return type that you give to a function while using the interface builder nothing much fancy about the IBAction you may refer this just like void type.
So create the outlet of the UITableView inside the MyViewController.h file and below given is the code to do that
#import <UIKit/UIKit.h>
@interface MyViewController : UIViewController {
IBOutlet UITableView *_tableView;
NSMutableArray *_teamArray;
}
@end
Step 4: Now inside the XIB file you have to attach this outlet with the UITableView that you dragged in so that the XIB file will come to know that this is the table which is know as the _tableView. To do that select the file Owner file and right click you will see a blak popup box containing the set of options and from their inside the outlet option you can see the _tableView outlet so just connect the outlet with the table view.

like where the datasource and delegate methods of the tableview because if you don’t do this then in that case the application will not display the table because the datasource and delegate method works together inorder to display a table.
So to do that please select the xib file and right click the table view now there you must be seeing the datasource and delegate options, so please drag these options to the file owner, now why the file owner it’s because the file owner has the reference to the MyViewController class which contains the datasource and delegate methods for the table view. Here;s the view to do that


You are almost done now please add the code to display the values form an Array inside the table and in case you need some guidance in that then please refer this tutorial.
Step 5: Please select the appDelegate.m file to create the object of the MyviewController but this time we have used the interface builder so in that case we will be using the initwithNibName :bundle: method to create the object of the class, why this method its because it will link the code and design file together and give us the view with functionality. Here’s the code to create the object of the class while you are using the interface builder.
#import "interfaceBuilderAppDelegate.h"
#import "MyViewController.h"
@implementation interfaceBuilderAppDelegate
@synthesize window=_window;
- (BOOL)application:(UIApplication *)application didFinishLaunchingWithOptions:(NSDictionary *)launchOptions
{
// Override point for customization after application launch.
MyViewController *obj = [[MyViewController alloc]initWithNibName:@"MyViewController" bundle:nil];
[self.window addSubview:obj.view];
[self.window makeKeyAndVisible];
return YES;
}
Run the application to get the view like this
Comments
Post a Comment